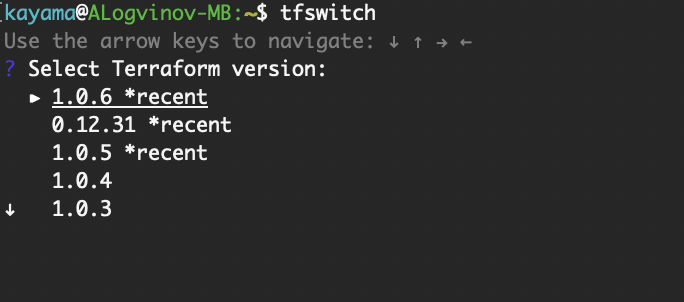
Very useful command: tfswitch
|
1 |
brew install warrensbox/tap/tfswitch |
That’s easy!
Add Label:
kubectl label node <node name> node-role.kubernetes.io/<role name>=<key — (any name)>
Remove label:
kubectl label node <node name> node-role.kubernetes.io/<role name>-
Let’s try:
$ kubectl get nodes
|
1 2 3 4 |
NAME STATUS ROLES AGE VERSION node-1.domain.loc Ready master 51d v1.17.0 node-2.domain.loc Ready <none> 51d v1.17.0 node-3.domain.loc Ready <none> 51d v1.17.0 |
$ kubectl label node node-2.domain.loc node-role.kubernetes.io/worker=
|
1 |
node/node-2.domain.loc labeled |
and check:
$ kubectl get nodes
|
1 2 3 4 |
NAME STATUS ROLES AGE VERSION node-1.domain.loc Ready master 51d v1.17.0 node-2.domain.loc Ready worker 51d v1.17.0 node-3.domain.loc Ready <none> 51d v1.17.0 |
How to setup L2TP over IPSec VPN server (Ubuntu 16.04)
|
1 |
apt-get install strongswan xl2tpd |
# (optional, need to check ) apt-get install ppp libgmp3-dev bison flex
Edit /etc/ipsec.conf
|
1 2 3 4 5 6 7 8 9 10 11 12 13 14 15 16 17 18 19 20 21 22 23 24 |
# /etc/ipsec.conf — Openswan IPsec configuration file modified for Strongswan # (c) Kayama 2018 # Add connections here conn L2TP-IPSEC authby=secret rekey=no keyingtries=3 type=transport esp=aes128-sha1 ike=aes128-sha-modp1024 ikelifetime=8h keylife=1h left=XXX.XXX.XXX.XXX # your router’s external IP leftprotoport=17/1701 right=%any rightprotoport=17/%any rightsubnet=0.0.0.0/0 auto=add dpddelay=30 dpdtimeout=120 dpdaction=clear #force all to be nat’ed. because of iOS forceencaps=yes |
Edit /etc/ipsec.secrets
|
1 2 3 4 5 |
# This file holds shared secrets or RSA private keys for authentication. # RSA private key for this host, authenticating it to any other host # which knows the public part. : PSK “TypeYourPassPhraseHere” |
Edit /etc/ppp/options.xl2tpd
|
1 2 3 4 5 6 7 8 9 10 11 12 13 14 15 16 17 18 19 20 |
require-mschap-v2 refuse-mschap ms-dns 8.8.8.8 ms-dns 8.8.4.4 asyncmap 0 auth crtscts idle 1800 mtu 1410 mru 1410 connect-delay 5000 lock hide-password local #debug modem name l2tpd proxyarp lcp-echo-interval 30 lcp-echo-failure 4 |
Edit /etc/xl2tpd/xl2tpd.conf
|
1 2 3 4 5 6 7 8 9 10 11 12 13 14 15 16 17 18 19 20 21 22 |
[global] ipsec saref = no debug tunnel = no debug avp = no debug network = no debug state = no access control = no rand source = dev port = 1701 auth file = /etc/ppp/chap-secrets [lns default] ip range = 192.168.1.10-192.168.1.20 local ip = 192.168.1.1 require authentication = yes name = l2tp pass peer = yes ppp debug = no length bit = yes refuse pap = yes refuse chap = yes pppoptfile = /etc/ppp/options.xl2tpd |
And finally add password to the /etc/ppp/chap-secrets file
|
1 2 3 4 |
test l2tpd TestTest “*” service xl2tpd restart service ipsec restart |
Everything should work fine!
Upd. 2022.01
That’s normal. With LXD 2.9 and the storage pool changes, LXD stopped generating automatic «root» devices for the containers, instead relying on inheritance from the default profile.
So in LXD < 2.9, every container had a local «root» device which you could then set properties directly on. With those LXD versions, adding a «root» device to your default profile would be entirely ignored as all containers would override it.
In LXD > 2.9, containers don’t have any devices by default, they instead rely on inheritance. Meaning that if you want to override it, you have to add a new device to the container with the same name so that it overrides the one coming from the profiles.
«lxc config show NAME» vs ” lxc config show –expanded NAME ” is pretty useful to see how this all works.
© https://discuss.linuxcontainers.org/u/stgraber
Add to the .bash_profile
|
1 |
alias makepasswd=”openssl rand -base64 $1″ |